Wednesday 31 December 2014

Sampler: 1/3 Twill on a Rigid Heddle Loom

My sampler of textures went so well that I was tempted to try something more ambitious that I have wanted to do for some time - - a twill.

It is definitely possible (and quite straightforward) to do a 1/3 twill on a rigid heddle loom using 2 heddles, a pick up stick, and a set of string heddles (or second pick up stick).  I say "quite straightforward" after I did what I should have done from the beginning - - consulted a book.  Jane Patrick's excellent The Weaver's Idea Book has a clear and detailed explanation of how to weave 1/3 twill on a rigid heddle loom.  Alas, Patrick's book was the second one I consulted - - the first was David Xenakis' The Xenakis Technique, which I have yet to understand in even the tiniest way.   Others have raved about this book, but I just cannot parse it at all for some reason.  Not only did I feel stupid for not understanding this book, I only confused myself beyond all understanding, getting more and more frustrated in the process.

The Xenakis book was no help, and a review of several blog posts and message boards about twill only confused me to the point that I was ready to scrap the entire project.  I tried a couple of different ways to thread my heddle, but without a clear idea of the treadling sequence, I was really just fumbling around in the dark.  Completely ineffectually, I might add.

I decided to sleep on things and in the meantime my partner the Nerd tried a new version of a 1/3 twill using the Xenakis book (which he understands much more than me).  He had long floats in his work from his fourth warp thread in each series, but there was definitely a twill pattern there, which gave me hope.  Reinvigorated, I picked up the Patrick book (which I should have done at the beginning), and sure enough, on page 191 were detailed instructions for tying up a 1/3 twill, complete with full treadling instructions.

Here's where the simple stuff comes in.  Patrick has a nice clear drawing for how the two heddles should be threaded.  My only complaint is that her drawing is upside down to me, since I thread my back heddle first.  Here is the threading sequence seen from the front looking back (rather than from the back looking front, as in Patrick's book):

Working from left to right across the rear heddle thread #1 goes in a slot, and thread #2 goes into the hole immediately to the right.  Threads #3 and #4 both go in the next slot immediately to the right.  The next hold is skipped, and then the pattern repeats across the reed, with the next thread being placed in the first slot to the right of the skipped hole.

For the front heddle, the first three threads (from the first slot (#1), the hole (#2), and the left-most thread of the second slot (#3)) all go into the slot directly under the slot with the double threads on the rear heddle, as shown above.  The right-hand thread from the second slot (thread #4) goes into the hole to the right of the 3 threads just placed.  The next slot and hole are then skipped, and the pattern repeats again. 

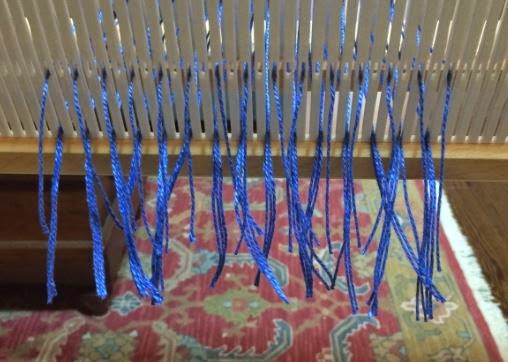
Here's how the rear heddle looked on my loom:

And here's how the front heddle looked:

All together now:

Placing the first pick up stick was simple.  I placed both heddles in the down position, then picked up the left thread of each pair, alternating 1 up x 1 down across the reed.

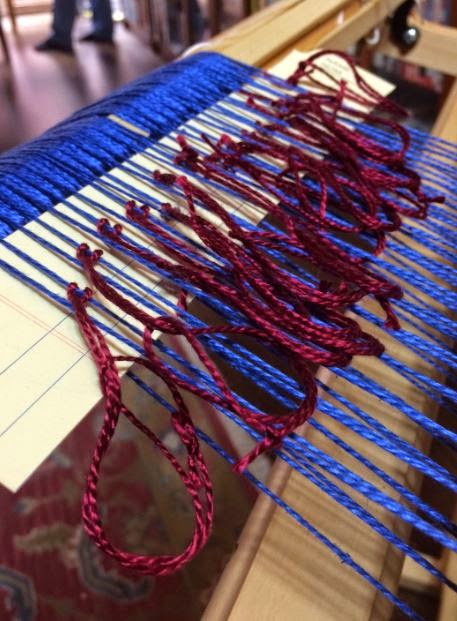
Patrick recommends using a string heddle rather than a second pick up stick for the 1/3 twill, so that's what I did for this sampler.  You can see the strings for the heddle in place (without the stick).  For this sample I attached the string heddle to the right thread in each pair, that is, the thread not already picked up by my first pick up stick.


It was a very simple matter to attach the string heddles to a length of dowel cut for the purpose.  This photo is somewhat misleading as I actually moved my pick up stick to behind the string heddles before I started weaving, but this photo clearly shows how the string heddles and the pick up stick lift alternating warp threads.

[If I were some bloggers, this is where I would stop, leaving the whole treadling sequence as some elaborate mystery.  Elaborate mysteries suck, though, so I'm not going to do that.] 

Ironically enough the Nerd and I stumbled across the proper treadling sequence in our trial and error efforts, we just didn't know it.  Patrick confirms that the proper sequence is:
     Row 1: front heddle up
     Row 2: heddles in neutral, pick up stick [A]
     Row 3: back heddle up
     Row 4: heddles in neutral, string heddles / pick up stick [B]

And that's all it takes (!).  This produces a 1/3 twill with weft floats that appear to move diagonally up and to the right, as shown in the bottom portion of the photo below.

It's just as simple to reverse the direction of the twill by reversing the above sequence:
     Row 1: heddles in neutral, string heddles / pick up stick [B]
     Row 2: back heddle up
     Row 3: heddles in neutral, pick up stick [A]
     Row 4: front heddle up
This produces weft floats that appear to move diagonally up and to the left, as shown in the middle portion of the photo below. 


For this sampler I finished off with a simple basketweave that is made by simply weaving up and down with the front heddle only.  This produced a very dense, horizontal weave as shown in the top portion of the photo above. 

The pattern can also be seen on the reverse of the work:


Tuesday 30 December 2014

Sampler: Rigid Heddle Pick Up Stick Patterns

Because tabby weave is all very well and good but a little - well - boring, I am learning new texture techniques for my Kromski Harp rigid heddle loom.

Over the holidays I picked up a fantastic book, Textures and Patterns for the Rigid Heddle Loom by Betty Linn Davenport, which is just chock-full of interesting patterns and techniques.  The copy I ordered from Amazon shipped in a day or two, and came complete with a signature by Betty Linn Davenport herself.  Her handwriting is just as lovely as you would expect from someone with a name like "Betty Linn Davenport".

I started small, with some simple weft floats.  For these patterns I inserted my pick up stick 1 up x 1 down (repeated), 2 up x 2 down (repeated) and 3 up x 3 down (repeated), working from right to left across the row.  Looking up from the bottom, the number of pattern rows in each series increased.  In each case these the pattern rows were worked with the heddle in the neutral position.

Weft Floats front (L) and back (R)

Moving on to warp floats, I did not change the position of my pick up stick.  This time the pattern row was woven with the heddle in the up position.  As with the weft floats, the patterns change from a single pattern row in a series to longer floats covering multiple rows.

Warp Floats front (L) and back (R)
Warp and weft floats are symmetrical, in that if you float your weft on one side, you get a floating warp on the reverse, and vice-versa.  So no, I did not simply repeat the first set of photos and reverse the order, although it certainly looks like I could have.

Now came the time for some lace weaves.  I started with a simple 3/1 lace for which the pick up stick was set 1 up x 1 down all the way across the row.  This pattern, like the weft float it is based on, used the pick up stick in the neutral position for the pattern row, with 1 pattern row (row 2) and 3 plain weave rows (rows 1, 3, and 4).

3/1 Lace front (L) and back (R)
I liked the texture of the 3/1 lace, both on the front and the back of the piece, although the pattern was very subtle on the 3/2 mercerized cotton that I was using for this sampler.

The 5/1 lace is very similar in concept to the 3/1 lace, but in this case the pick up stick was set up as 1 up x 2 down across the row, and there were 2 pattern rows (rows 2 and 4) and 4 plain weave rows (rows 1, 3, 5, and 6).  I didn't like the look of this lace quite as much as the 3/1 lace, which has a certain symmetry I found lacking in the 5/1 lace.

5/1 Lace front (L) and back (R)
I also did some colour studies in my sampler such as an weft float in contrasting yarn, loom controlled inlay, and a couple of colour variations, but the purple I used as my contrast colour is very difficult to see (some would say impossible to see) against the bright royal blue of my background, so I am not including photos of these studies here.  Suffice it to say that I did these techniques, and while I liked the effect on the front of the work (although it would have been more impressive with a thicker contrast yarn), I did not like the big floats of contrast colour on the reverse side of the work.  These effects got a big "meh" from me, but they are likely very useful to know for the right work (perhaps for something lined so that the messy underside is hidden).

Another lovely pattern is the Double Huck Spot Weave created with 5/1 weft floats and 2 pick up sticks used in sequence.  The first pick up stick is inserted 4 up x 2 down across the row.  The pattern is then worked with a series of 6 rows, with rows 2 and 4 being pattern rows with the pick up stick in the neutral position, and rows 1, 3, 5, and 6 being plain weave.  Once this series is completed the second pick up stick is inserted 1 up (2 down x 4 up, repeated across the row), and the pattern of rows repeats, with the second pick up stick being used in the pattern rows just as the first was.
5/1 Weft Floats (Double Huck Spot Weave) front (L) and back (R)
I can see how someone would be tempted to set up the second pick up stick pattern using string heddles because it must be an almighty pain in the butt to have to remove and re-insert the second pick up stick every 6 pattern rows.  It was fun for my little sampler, but I can see how the novelty would wear off really quickly if weaving a larger piece.  Which is a pity, really, because it creates a lovely effect.

Another of my favourite textures, the Window Pane laces, are created by warp and weft floats.  The first is a 3/1 Window Pane, which uses a single pick up stick set 1 up x 1 down across the row.  Unlike the plain 3/1 lace, which used the same pick up stick setup but only had a single pattern row with the heddle in the neutral position, the 3/1 Window Pane has 2 pattern rows in the series (rows 2 and 5), the second of which was woven with the heddle in the up position. The remaining rows (rows 1, 3, 4, and 6) are plain weave.  This pattern creates a wonderful symmetrical effect that is virtually indistinguishable from the front to the back, and is very easy to weave.

3/1 Floats (Window Pane) front (L) and back (R)
The 5/1 Window Pane also produces a very interesting effect, and although it is not symmetrical from front to back like the 3/1 Window Pane, the back is pretty in its own way.  This pattern is woven, like the 5/1 lace, with a single pick up stick set 1 up x 2 down, repeated across the row.  For this pattern there are 3 pattern rows (rows 2, 5, and 7) with the latter two pattern rows being woven with the heddle in the up position.  The remaining rows (rows 1, 3, 4, 6, and 8) are plain weave.

5/1 Floats (Window Pane) front (L) and back (R)
I also played with my new tassel twister because hey, why not?  It worked great, and I can see how it would produce a lovely effect on longer fringes (rather than the stumpy little fringe-ettes I had in my sampler).


So all in all it was a fruitful evening spent learning many interesting new textures.  I already have a few I would like to incorporate into my next throw, if not all the way through, certainly near the edges for interest.


Monday 29 December 2014

Project: Red and Black Houndstooth Shawl in Merino

Before the holidays we had dinner with some friends and one of them told me her favourite colours were red and black.  Well, that just screamed out "houndstooth" to me.  I love that colour combination and I was pretty sure I could weave something nice. 

For this project I chose a wonderfully soft merino wool from Malabrigo in Ravelry Red and Black that I picked up at Romni Wools on Queen Street West in Toronto.  Each skein contained about 210 yards, so I picked up 5 skeins of each colour (for safety) to ensure I could set up a 100+ inch warp across 300 ends and not run out of wool. 

Rather than using my 12-dent heddle (as I did for the lilac and black shawl), I went with the 10-dent heddle after seeing that the yarn could comfortably work on even the 8-dent heddle.  I was pleased with how easy it was to sley the reed using the 10-dent heddle (much easier than the 12-dent).  The wool was also very easy to weave using the 10-dent heddle, not rubbing overmuch on the reed and throwing off only a slight amount of lint. 

This wool is very stretchy however, so I had some concerns about how evenly it would weave up, but it turned out the weave was fairly balanced and it appears my concerns were misplaced. 

This is your typical 2 x 2 houndstooth pattern - - 2 ends of each colour alternating across the reed with 2 picks of each colour for the entire length of the warp. 

I was hoping for a shawl that measured more than 70" long by 24" - 27", and the finished shawl after washing and trimming ended up being 72" x 26" - - right in the sweet spot.


Santa brought me a fringe twister for Christmas so my next big work will have twisted tassels.  The ends for this project were left in a simple fringe that untwisted after washing into a fluffy end treatment that is kind of visually interesting, if nothing else. 

I hope my friend likes her shawl!


Final wave of cotton tea towels for the holidays

With Christmas rapidly approaching and the Nerd's family rule of "no gifts for adults ... but homemade gifts are OK" in play, it was time to ramp up my production of cotton tea towels for gifts. 

This time I was serious.  Rather than the usual 2.5 yard warp to produce 2 towels, I warped my loom with 5 yards to create 4 towels out of a single warp.  Not only that, I was making not 2 sets of towels, but 4 sets of towels - - 8 towels altogether - - in two different colour combinations.  Yes, I was kicking the towel production up a notch.


The equipment was my trusty Kromski Harp rigid heddle loom with a single 8-dent reed.  For this batch of towels I chose the old standby Lily Sugar n' Cream white cotton as the base, with Lily Sugar n' Cream Twists in a denim blue for one set, and Lily Sugar n' Cream "Moondance" Ombre for the other set.  Sugar n' Cream is the yarn called for in Angela Tong's online Craftsy class that is the source of the pattern for these towels, and although it is a little harsher to the touch when it first comes off the loom than the beautiful Cascade Luna Peruvian cotton I have used on some towels, I still love the way this yarn weaves up.  Plus, the Sugar n' Cream is a super-absorbent yarn - - the Nerd and I have been enjoying our new kitchen towels made from this same cotton (in white with green twists for contrast). 

I found that working with the longer warp for each set was pretty much the same as working with the shorter warp, but I had tension issues on one end of each set that resulted in my stripes having a tendency to have varying widths from one end to the other, if left uncorrected.  I suspect that I tightened up one side of my warp too much, or that it was deviating because for some reason (i.e. bad math) I set up my warp off-centre for each set of towels.  The tension issue was readily corrected, however, and the finished products did not look too hinky or uneven. 

Here's the blue set in progress:

And the purple set:


I was pleased with the finished products and the towels given as gifts were very well received (even though people initially thought they were placemats).  I was also pleased with the efficiency of using the longer warp to create more finished items, and I will definitely take advantage of this in the future.  After all, setting up the warp takes all the time and it is not significantly more labour-intensive to warp 5 yards compared to 2.5 yards.  The weaving is quick, comparatively speaking. 


We still have a set of tea towels left over as only 3 sets of towels were given away (2 sets as Christmas presents and 1 set as a thank-you gift).  Now I have to start thinking of what the 2015 towel pattern will be, as the 2014 pattern has been almost done to death.  It's such a classic pattern, though, that I may cheat and run off a few more sets of this pattern to use up some of my leftover Cascade and Sugar n' Cream yarn. 


Monday 15 December 2014

Project: Houndstooth Shawl in Merino Wool

It is no secret that I love houndstooth - - it's a beautiful pattern that is deceptively simple to make.  And if there's anything that I love more than the deceptively simple, I don't know what it is. 

For this project I chose Kollage Happiness fingering weight 100% superwash merino wool in black and lilac.  Each skein is 100g / 450 yards.  I estimated that I would require about 1050 yards of each colour, so for safety I picked up 3 skeins of each colour intending to try for a finished work that was 28" wide x 70+" long (I wasn't too fussy about the length so long as it was more than 70") using a 12-dent heddle. 

My challenges on this project came early.  My first 12-dent heddle was broken adjacent to one of the holes, something I discovered only as I was about to begin threading the holes in my heddle.  This required me to manually transfer the entire width of my warp to my second 12-dent heddle.  Many profanities were heard that afternoon, I will tell you.  Thank you weaving gods for my double-heddle setup, so that I had a backup heddle ready to go while the Nerd repaired the defective heddle. 

My next challenge was in threading the holes in my heddle.  I think that the 12-dent heddle was actually the right call for this particular wool, however it is very challenging threading my 12-dent heddle with the hook provided with my loom.  Because the hook itself barely fits through the heddle, let alone with wool, threading each hole was a challenge of wills requiring much to-ing and fro-ing, and I had more than half a dozen ends simply disintegrate as I was pulling them through a hole.  This left me with several extremely short ends amidst many longer ends, and I probably lost more than 2-3" of warp in evening everything out.


I also had 1 end come through the hole only 2/3 of the way, leaving a twist of fiber on the back end of the heddle, something I did not notice until I had been weaving for a few inches.  More cursing.  At the end of the day, however, this did not pose an insurmountable problem as I simply worked the tag end of the wool towards the back of the loom as I advanced the warp to prevent it from ratcheting up the tension on the one warp thread as it got caught on the heddle.  I can't even tell where it was in the finished piece, which is nice. 

Although I think the 12-dent heddle was the right call for this fingering weight wool it was a close thing, and I found the wool had a real tendency to stick together making it difficult to get a clean shed.  This was remedied by the judicious use of pick up sticks to help me manually force sticky warp threads apart, ensuring that my weaving errors were kept, if not to a minimum, to a dull roar. 

I didn't do anything too fancy with this shawl, just a plain hemstitch at each end with a moderate fringe, but the simplicity works for this pattern, I think.  I did add a little ceramic "M" at one corner as a signature (just in case the usual errors I included in the piece weren't enough to identify me!).

Right off the loom the finished piece was 26" x 74", and after washing and hanging to dry the shawl ended up being 24 1/2" x 72".  I was pretty happy with the length (although I do prefer longer shawls as a rule and would probably go even longer next time) and even though I had more draw-in and shrinkage than I expected on the width, I think I could happily have gone a little narrower on the width, so this was not a bad result. 


Like the baby llama, merino is another wool that sheds like a mother, but feels so soft in the hand that all is quickly forgiven.  So long as there is a lint roller close at hand, anyways!


I love how this piece turned out and am keeping it for myself.  I have rationalized that it's OK to be selfish some of the time.  Besides, my next project is a return to industrial scale tea towel fabrication as preparation for Christmas.  Those will all be given away, so everything balances out. 

Sunday 7 December 2014

In a stunning change of pace ... more cotton tea towels!

I ordered more Lily Sugar n' Cream yarn because I had a plan to work up a few more sets of cotton tea towels using that same Craftsy pattern by Angela Tong.  I have to say that the cost of the class has been more than amply repaid by the enjoyment I have had in making my multiplicity of tea towels.

On a recent trip to Columbus I visited a Jo-Ann store looking for cotton yarn, and I stumbled into the motherlode of Lily Sugar n' Cream yarn - - the store had lots of colourways that I simply could not buy online in Canada, like purples and blues, as well as scented yarn (that I most assuredly did NOT purchase) and other novelty yarns.

Because I have impulse control issues (!), I picked up a couple of balls in several colours as well as a couple of 14 oz cones of white cotton for the base.  This allowed me to weave yet another set of tea towels last weekend.

For my first pair of towels I used Lily Sugar n' Cream in white and a variegated pink.  The pink yarn has a very gradual colour change and ranges from an off-cream to deep pink, so the colour demarcation between the white and contrasting colour was not as sharp as, for example, the Cascade Luna blue or purple.  But the colour is still lovely and bright and I quite liked this combination.


I took a risk for the second pair of towels and was partially pleased with the result.  On my last trip to Romni Wools I picked up a couple of skeins of interesting cotton yarn with a view of using them in tea towels.  The first one I tried was Sakura cotton yarn blend (50% cotton, 30% viscose and 20% silk) in "Minami", which transitions in colour from ivory to beige-brown to pink to denim blue.  This was another yarn with a very gradual change in colour, and the ivory to beige shift was too close to the base white for my liking.

This yarn has a definite variation in it, with parts being thicker and other parts being so thin I feared for the integrity of my warp.  The yarn also had an irritating tendency to twist, which made for a challenging time keeping clean edges and required constant warp maintenance to untangle twists whenever I rolled my work to the front beam.  I liked the yarn more after washing, though, since it fluffed up nicely and filled in all the gaps I had initially seen when the towels first came off the loom.  I am a little concerned about the yarn's durability however, because the fringes started to almost disintegrate after the most delicate of washing - - OK for a decorative towel, perhaps, but not a good sign for an every day towel that someone will frequently wash.

I couldn't imagine working with this yarn again it was such a pain in the ass to work with so I trashed the leftovers.  I am also very leery about using the second skein of Sakura yarn (in a different blend) that I picked up at the same time, for the same reasons.


One new thing for me was to fold my loom and put it into its travel bag with a project still on it - - we departed Columbus after I had just begun to weave (but not yet finished) the white/pink towels, and the Kromski Harp loom worked perfectly, just as advertised.  I loosened the tension on the front and back beams and simply released the catches and the loom practically folded itself up.  A little shuckling back and forth was all it took to fit into the travel bag, which had lots of room for my loom and accessories like heddles, pick up sticks, bobbin winder, bobbins, and bag of tools.   

Overall I am pleased with the weavability of the Lily Sugar n' Cream cotton yarn, and am adding to my stack of gift towels as ammunition for the holidays.  These are a fun, quick, project.

Shawl with Edge Detailing in Silky Baby Llama Wool

I had dinner with a dear close friend of mine last month and her response when I told her that I had taken up weaving was to tell me that she would absolutely cherish a wrap in a dark charcoal colour.  Because I dislike making things for me and love making things for other people, this seemed like the perfect opportunity to try a larger project.  Challenge accepted!

After much consideration, I chose Illimani's Silky Baby Llama (70% baby llama and 30% mulberry silk) in a dark grey that looks almost black.  The Nerd and I went to Romni Wools on an expedition to find wool for this shawl and their selection is truly awe-inspiring.  They almost had too much wool, if such a thing can be said, because although their breadth of selection was wonderful, the depth in any given colourway was a little shallower.  I was able to pick up the 10 skeins I thought I would need for this project, however, so they had enough for me (which is all that counts). 

I tried to estimate how much wool I would need based on the size of my finished project.  I planned initially on using a 12-dent heddle across all 32" of my loom with 100" warp to try and get a total length of 70" and width of 28" after draw-in and shrinkage.  When I got home with the wool, however, I ended up using the 10-dent heddle instead, so I ended up with some skeins left over (rather than requiring around 2100 yards I probably only needed about 1700 - 1800 yards of wool when all was said in done due to the change in heedle).

This was my first experience using the absolute maximum width of my loom (in a single heddle configuration), and it worked pretty well, with a couple of things learned.

First, the warp was long enough that it was quite bulky on the back beam after I tensioned everything, and during weaving some of my outer warp threads on one side "fell off" the mass thereby causing a minor sudden loss of tension in one warp thread.  It was easily manually corrected, however, and did not appear to compromise the finished work.

Second, I discovered that all of my pick up sticks that came with my loom (or purchased separately) were just short of the full width of my reed.   This I discovered early on because my plan for this project was to incorporate a 1 x 1 leno with a Brooks Bouquet near each edge - -trying to set up the leno with two pick up sticks for length was tricky.  This was only a problem for the leading edge of the work, because by the time I reached the far end the Nerd had made me an absolutely beautiful pick up stick in red oak that was the perfect length.  Now I suddenly want to do a lot of projects with pick up sticks for some reason. 

The actual weaving of this project was pretty quick even with the fussiness on the edges because the majority of the work was done in a simple tabby weave.  All in all, it took less than a week to complete this project, although I did do a very late night on my final night because the Nerd and I were travelling to visit family the next day. 

The finished shawl after washing netted out to 29" wide (slightly wider than the planned 28") and 70" long for the body of the shawl not including several inches of fringe - - exactly on plan.  In hindsight that 70" feels a little short and I may go a bit longer for my next shawl as a result. 

This wool wove up smoothly and well, and the wool is aptly named because it feels very silky to the touch, but it also sheds quite a bit, at least initially, so I am uncertain of the utility of using this wool for a different project like a scarf that requires more durability.  But I would love to work with this wool again, so maybe I will use it regardless, just because.


All in all I love this shawl and I hope my friend enjoys it too.  It was very satisfying to weave up because the simple weave meant that I could weave up several inches a night - - a far cry from my knitting days, for sure!  Given that it took a week to make it was not quite immediate gratification, but it was immediate gratification enough for me.