The arrival of my second heddle meant that I was free to try more complicated works on my rigid heddle loom including double weave. I have to confess that I fell in love with the weaving porn shown on the cover of Jennifer Moore's beautiful
Doubleweave book, and the second heddle was largely driven by my desire to create something so intricate.

But since I am still a beginner weaver, baby steps were in order. Step 1 was to try a bit of a sampler in doubleweave in the form of a shuttle holder. As it happens I found a
truly excellent instruction online from the Ashford site, extremely well illustrated with clear step by step instructions and photographs of every step in the process. This tutorial really helped me to overcome my fear of doubleweave, and helped me to work through some of my many issues with the technique.
For this project I picked up some lovely hand-dyed 100% superwash Merino wool from Tanis Fiber Arts in Natural (ivory) and Iris (gorgeous variegated purple). Each skein contains 260 yards, which actually goes quite a long way in a project like this - - using my 8-dent heddles I ultimately went through 2 skeins of each colour, 1 for each of my attempts and I had a lot of loom waste the second time around (mostly because I was tired of weaving this pattern and cut it off short).
In my first attempt I warped my loom in the usual way and did not pay particular attention to the order of the colours of my warp threads with the (perhaps not unexpected result) that I had many many crossed warp threads and no real sheds to speak of as a result when I tried to place my pick up sticks.
So I went back to the drawing board and took everything off the loom and started from scratch, this time paying exquisitely close attention to the position of my warp threads relative to each other so that crossed warp threads were minimized. In fact, so paranoid was I about policing my warp that I actually did the entire threading process one slot and hole at a time even before I wound my warp onto the back beam. Labour intensive? Check. Practical? Hell no. But it did help me to better understand what I was trying to do with the warp and it definitely helped me to get some beautiful clean sheds once I began to place my pickup sticks.
My first attempt was a first on many levels for me. It was my first attempt at using two heddles; it was my first time using pickup sticks; and it was my first time attempting to create two layers of cloth at once. I think it shows a certain defect in my personality that I consider this to be "baby steps".
This first project taught me many things about weaving in two layers. First and foremost I learned to be very careful about what is happening underneath, because you cannot easily see that bottom layer. In my first piece I actually dropped several warp threads off my pickup stick somehow and my shuttles were as a result catching threads about .25cm in from the edge, and it took me so long to notice this that it was impossible to go back and fix it. Whups!
Once I realized this I took to using a guide stick to help me place my shuttle correctly in each pick, and to help ensure I was not missing any warp threads. My weaving immediately got cleaner after this (although still full of errors). My weaving also immediately began taking much much longer.
 |
| My first layers! |
Still, I was pretty happy with this first work which was always intended to be a learning piece. I managed to create a functional (if primitive) work that did, in fact, have multiple layers. I learned how to create Brooks Bouquet as an added decorative element (it's much easier than it looks), and I learned and improved as I went along.
But wow, were there a ton of mistakes in the weave. I know that errors are kind of my identifying characteristic, but this first doubleweave swatch took the tradition a little far, even for me. The work was not
quite as bad as my very first piece, but it was not as clean as it could be by a far stretch.
So I started a new piece, intending to try even more new things. Because heck, why not?
The first innovation was in setting up my warp. Remember back on my first houndstooth runner when I laboriously tied up each and every individual pair of warp threads in each colour? Yeah, I knew there had to be a better way, and in fact, there is. Simply by holding two colours in your hand separated by one of your fingers you can wind the warp around the warping pegs as required without ever tying off the individual colours. The warp threads have a propensity to twist more or less depending on how many corners you incorporate into your warping board plan, but the twisting is all on the side of the balls of wool, not on the warping board itself. Using this technique the only time I tied a colour off was when I started and then when I finished by warp - - this made a
huge difference in the time it took me to set up my warp, and I will definitely warp colours this way from now on.
 |
| Add caption |
The next innovation was discovering that I could entirely reverse my colours using a different combination of pickup sticks.
On my first piece I always had ivory on the top layer and the variegated purple on the bottom layer because that was what happened naturally the way I strung my warp and oriented the pickup sticks as instructed in the Ashford tutorial.
I knew that it was possible to switch the top colour of a doubleweave work on a 4-shaft loom and I assumed that this was impossible on a double heddle loom. Not so! It just takes a different configuration of pickup sticks and different combination of heddling up and down compared to the first pattern, something I discovered in Jane Patrick's wonderful
The Weaver's Idea Book.
For example the ivory-top/purple-bottom pattern required a pickup stick under all the ivory warp threads and a pickup stick in the shed created underneath when the first pickup stick was turned up, combined with a front heddle up / back heddle down pattern. In contrast, the purple-top/ivory-bottom pattern required a pickup stick under all the purple warp threads (and second pickup stick in the resulting shed), with a back heddle up / front heddle down pattern. It almost blew my mind when I made the switch and saw the colour change - - I had no idea I could do this, but I was delighted.
I tried to have all 4 pickup sticks sitting in back of the loom at the same time and this did not work at all for me - - the first set and second set would not float over one another the way the two of each set floated over one another, so I found it easier simply to remove the one set of pickup sticks and replace it with the second set entirely. This also helped me as at times despite my best efforts the warp threads got tangled, and I was able to straighten things out on the changeovers, something that was impossible to do when the pickup sticks were holding the warp threads in place.
 |
| Take 2 |
My second attempt was much cleaner, even though I did not do the ultra-high maintenance method of warping that I did the first time. I was more attentive to the order of my warp threads as I threaded my heddles and I attempted to keep twisted threads to a minimum, but all in all it was pretty quick to warp up the loom this time, especially using the 2-colours at once technique.
I love the fact that I can do doubleweave on my rigid heddle loom and I can see many possibilities to this technique, not the least of which is the possibility of effectively doubling the width of my 32" loom by joining the work on one side.
But I would be lying if I said that this was my favourite technique. Doubleweave is
extremely labour intensive, because you are effectively weaving twice the length of fabric at the same time, which means that it takes twice as long to weave each inch of finished fabric. Plus it is a very fussy technique with a lot of checking and cross checking required to keep the bottom layer as clean as possible.
All in all, however, I am very pleased with this project and everything I learned on it. I like the look of the finished shuttle holder and even though doubleweave is a complex technique, it is easier than it looks, really.
I will keep working on my technique though before I try that doubleweave on the cover of Jennifer Moore's
Doubleweave book - - my skills are nowhere near ready for that yet!
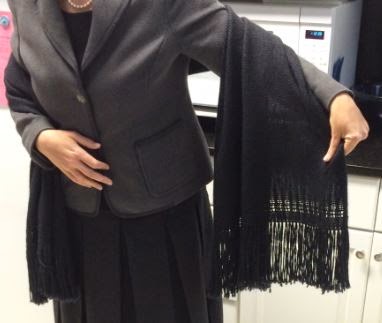
 After much consideration, I chose Illimani's Silky Baby Llama (70% baby llama and 30% mulberry silk) in a dark grey that looks almost black. The Nerd and I went to Romni Wools on an expedition to find wool for this shawl and their selection is truly awe-inspiring. They almost had too much wool, if such a thing can be said, because although their breadth of selection was wonderful, the depth in any given colourway was a little shallower. I was able to pick up the 10 skeins I thought I would need for this project, however, so they had enough for me (which is all that counts).
  This was my first experience using the absolute maximum width of my loom (in a single heddle configuration), and it worked pretty well, with a couple of things learned.

 The finished shawl after washing netted out to 29" wide (slightly wider than the planned 28") and 70" long for the body of the shawl not including several inches of fringe - - exactly on plan. In hindsight that 70" feels a little short and I may go a bit longer for my next shawl as a result.